


Ask Maeve: My bathroom cabinet is a black hole
- Maeve Richmond
- May 12, 2017
- 5 min read

Updated: Feb 13, 2023
Maeve helps a pregnant couple organize a deep bathroom cabinet. #organizing

Featured as part of the Good Housekeeping Spring Cleaning Challenge: 11 Unbelievable Spring Cleaning Transformations.

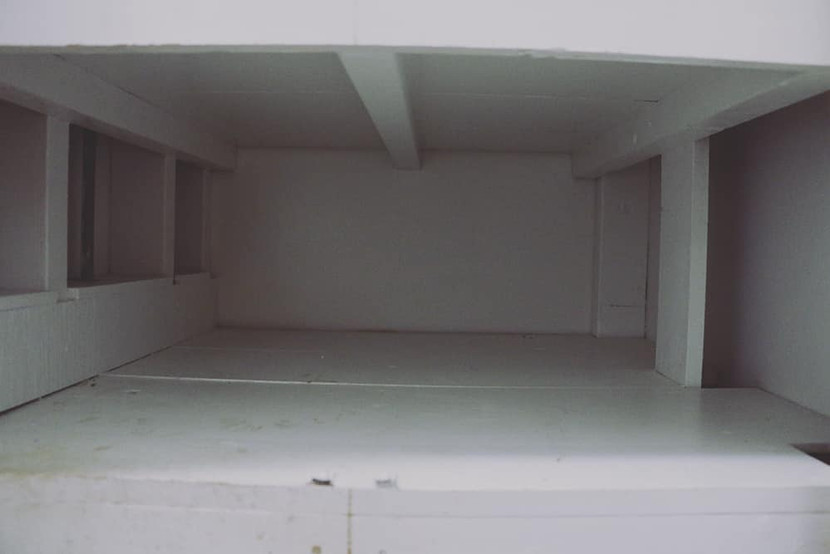
We bought a house a few years ago and I thought that I would love the massive cabinet in our tiny bathroom. Unfortunately, it has turned into a black hole of products, tools, towels and jewelry. The drawers are so deep that I can hardly get to anything in the back, and the shelves are equally as deep, which means I have to layer items in the front and dig out items in the back. We have a baby on the way, and I’d love to dedicate a shelf to them. It would be amazing to be able to open it up and know exactly where to go for everything instead of it being a disaster. Can you help? – Ashley in Wisconsin
Dear Ashley,
Indeed I can! I hear you – that really is a massive #bathroom cabinet. I get how frustrating it must be that things get lost repeatedly because it is so deep. And with baby on the way, there's no better time than now to get some order in place. I’ve got some quick and easy ideas for you to try out. I hope these help -- I can't wait to hear how it goes!


Step 1. Introduce Trays or Sliding Drawers
Before we get to organizing, I want to address the depth of this #cabinet. Since we can’t work around it, let’s work with it.
A major challenge is not being able to see or access items in the back, so I suggest you introduce organization tools designed specifically to deal with this issue. #storagesolutions
This 2-Tier Pull-Out Cabinet Organizer is a great solution. As you can see it slides out, giving easy access to items in the back. This bamboo sliding tray is nice as well. Or, you can use a simple tray. I love trays as they leave room for both short and tall items. And, they are long so they make good use of deep space. I prefer serving trays (like these) for a situation like yours as they have walls and handles, so things won’t tumble out. And you can easily grab a handle and drag it partially or fully out. A combination of pull-out organizers and trays are the ideal way to work with your deep shelf issue. #welovetrays
Since we can’t work around it, let’s work with it.

As for the #drawers, a layer of plastic #tubs inside will organize this space (and keep things from floating about). Tubs like these from Target work great. Lose the lid (tuck it under, or use it as a tray). Line three to four side-by-side, two layers deep, then place in towels, bath supplies, whatever you wish.
Double-sided tape under the tubs will keep them from sliding around. Keep in mind, both trays and tubs come in great colors, so if you go in this direction use pops of color (like this) to brighten your day. You can even use colors to help you organize (i.e. green for your things, blue for your husband’s).
Double-sided tape under the tubs will keep them from sliding around.
Step 2: Like Things Live Together

First, let’s have you clear a #workspace. You are about to remove everything from the shelves and drawers, one item and one section at a time. A great spot is right there on the bathroom floor, so you can set up shop there.
Next, empty the contents of one shelf or drawer into your workspace. Then pick up one item from the workspace at a time and ask yourself, “What is this?” Your answer should tell a story. So less this is hair spray and more, this is a beauty product I like to have around but rarely ever use, so I’d like to keep it but I don’t need it up front it can get tucked a bit in the back. #findyourstory
Work to find the story that tells the purpose for each item, not the what the item is technically. Essentially, you are looking for the “why” this item lives in your bathroom cabinet.

As you work, make piles of ‘like things’ in your workspace in what I call ‘categories according to you’. For example, you might have a pile called, ‘beauty products I bought to try but never got around to using’, another called ‘first aid stuff that my entire family uses’, and another called ‘bulk bathroom supplies’ or ‘going-out jewelry’. The goal is to get specific about how these items function in your life. Be honest, and have fun as you sort. Each item has a story to tell about why it is in your life. #categories
Do this shelf by shelf then drawer by drawer until you’ve cleared the entire cabinet. Don’t be afraid to toss items you no longer need, or that are old. Once cleared, make a list of your categories. This is important, as what you have determines where you put it back.
Step 3: Dedicated Shelves & Drawers
With your entire cabinet cleared, give it a deep clean. Then look at the empty space and ask yourself, how do I want to set this back up? A good rule of thumb is: active and frequently used items on middle shelves, less active and bulk items on the floor (for quick access) or way up high and tucked out of the way. Basically, put items back according to frequency of use. Since you want a baby shelf, this is a perfect time to implement this. I’d say choose the shelf that is easiest to reach (I’m guessing the second), then mentally name that ‘baby shelf’ – and there you go! #deepclean #frequency #goals

A good rule of thumb is: active and frequently used items on middle shelves, less active and bulk items on the floor (for quick access) or way up high and tucked out of the way. Basically, put items back according to frequency of use.
Step 4: Inner Storage
With so many tiny items, it’s time to break things down even further. Above I recommended #trays or sliding drawers. With those in place, tuck smaller ‘like items’ inside grouped in their own inner storage. For example, if you make a ‘hair products’ tray you can then put all hair ties on that tray in one little container or bowl, and all lipsticks and makeup in another. The more inner containers you use in a large tray, the better. Inner containers keep items from rolling around and shifting about. And make finding things – and putting them back – so much easier. Here are are few inner containers you can try (this plastic one or these colorful ones). Or, raid your kitchen for cups, mugs, ice cube trays and tiny serving dishes to personalize – they work great too! #innerstorage
Step 5: Let There Be Light

As a final step, install small battery operated lights or strip lighting inside your cabinet. This will make it easier to see and also draw the eye in, making it feel like an exciting place to be, and no longer a black hole. But before you do, go for fresh start by putting a coat of new paint on the cabinet, inside and out. With dedicated sorting and organizing work, the introduction of colorful storage tubs and trays, fresh paint, and inside cabinet lighting, this bathroom cabinet will no longer be a black hole – but a bright and cheerful place to be. Enjoy – and best of luck with the baby!


Check out Ashley’s amazing cabinet transformation on her blog, Hello Nature: Before & After: Bathroom Cabinet Organization Renovation.
Ashley, what an enormous change, amazing work!

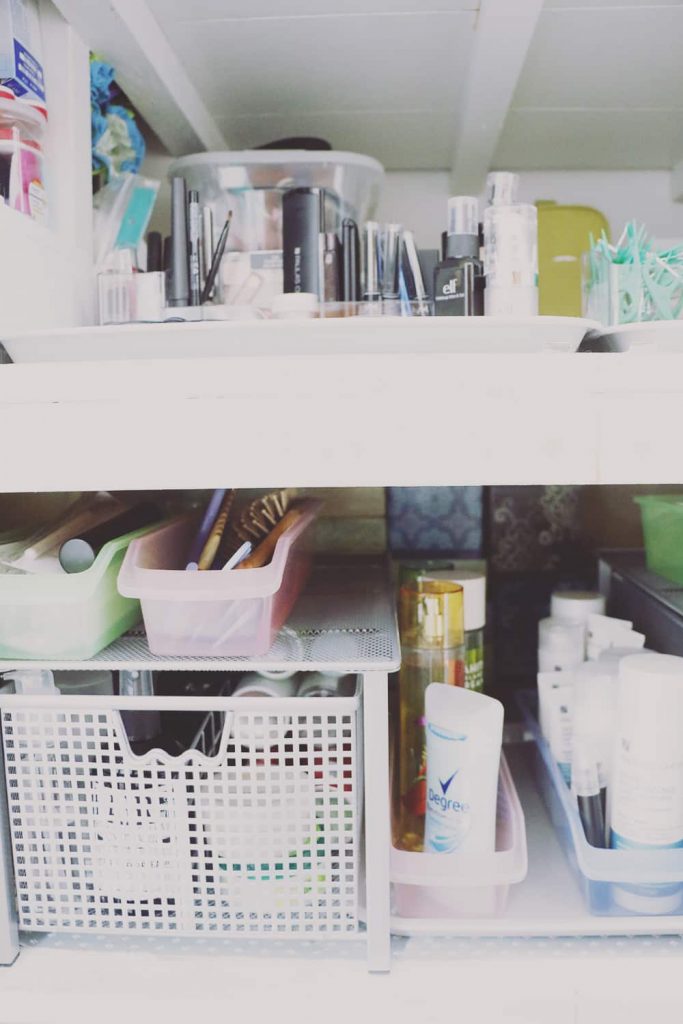


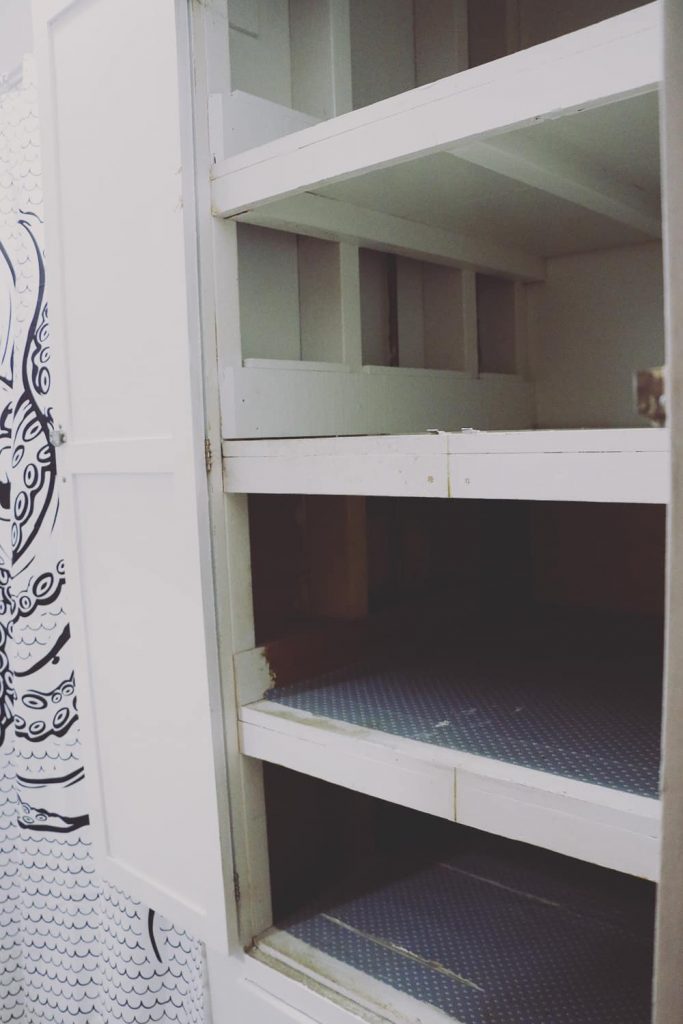
Photo Credit: hellonatureblog.com
RELATED STORIES

Maeve helps a reader get a handle on her high traffic pantry. #organizing

Maeve helps an entrepreneur balance her double-duty bedroom. #organizing

Maeve helps spouses organize shared home office space. #organizing


Comments